
For me, DIY projects were a great way to ensure everything coordinated with each other and kept in the same theme. Eric, and I were engaged for just over a year and a half, so I had a lot of time to experiment with different ideas and get everything done on time for the big day.
One of our most complimented DIY projects was our wedding favours. We didn't want to do anything extravagant for favours (as we heard most guests throw away wedding favours anyway), so we figured something edible was cost efficient and wouldn't go unappreciated.

The materials used to complete this DIY include:
- Ivory Favour Boxes - purchased from eBay (approx. $25)
- Ivory Card stock Paper - purchased from Michaels (approx. $20)
- Champagne/Gold Ribbon - purchased from Michaels (approx. $25)
- White and Gold Tulle - purchased from Michaels (approx. $25)
- Martha Stewart "Flourish Frame" Punch - purchased from Michaels (can also be found here) (approx $25)
- Purple Tissue Paper - purchased from Dollarama (approx. $4)
- Lindor Chocolates - purchased from Lindt - (approx. $150)
- Hot glue gun (already owned)
We made about 115 boxes, but had enough supplies to make plenty more.
Instructions
Instructions
Step 1: Assemble boxes as per the instructions provided.
Step 2: If you need to fill space in the box, use shredded tissue paper, then add the favour and close.

Step 4: Print desired text on cardstock (I added our names, wedding date and a swirley graphic). Use a fancy punch to cut the card tock into shapes. Hot glue the shape to the ribbon on the box.
Step 5: Create tulle flowers using the method below and hot glue the flower to the box.
1. Cut tulle into tonnes and tonnes of little square boxes (about 4x4 inches).
2. Fold each square about 4 times until it becomes a small triangle.
3. Cut a petal shape out of the triangle.
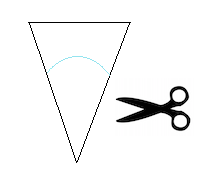
4. Open the cut out to reveal a flower shape.
5. Repeat these steps what will seem like a million times.
6. Place the tulle flower shapes (about 6 or 7) on top of each other, rotating each flower layer.
7. Once you have gotten your desired look, pinch the center of the flower, grabbing all the layers and staple (this will give it extra holding powder). Add a little hot glue to the center of the box and attach the flower, and voila!
